

Nút chỉnh gương hậu của xe Grandis không có đèn, buổi tối sẽ không sáng nên nhiều người đã nghiên cứu để cho nó có đèn, anh em bên Thái đã làm được. Nhi...

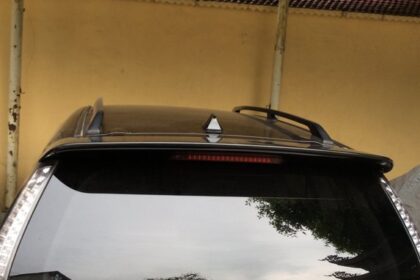

Grandis đã ngưng sản xuất từ 2012… Về phần bánh sơ cua nó thiết kế ở gầm sau để tiết kiệm không gian không được tốt nên nước mưa văng vào rất dễ...
Em mới thay cái tay nắm cho xe em nè các bác.nó bằng da và có 2 bên sơn cacbon… tuy nhiên đây không phải đồ cho mit nên không được khít lắm cái sơn carbon này...
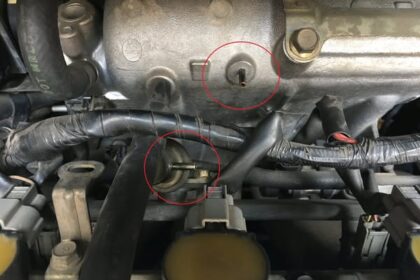
GÓC CẢNH BÁO: ỐNG HƠI CHÂN KHÔNG CỦA VAN ĐIỀU ÁP HƯ GÂY HAO XĂNG Vô tình tháo bugi nghịch nên phát hiện ra ống hơi chân không của van điều áp nhiên liệu bị n...
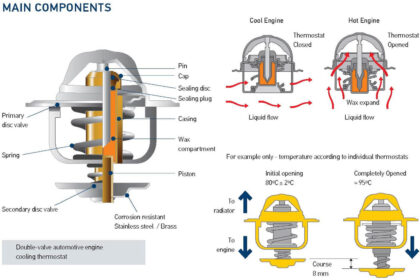
VAN HẰNG NHIỆT (Thermosat) ĐỪNG ĐỢI ĐẾN LÚC HƯ MỚI THAY Một trong các thiết bị quan trọng trong hệ thống làm mát trong động cơ xe ô tô là cái Van Hằng Nhiệt...
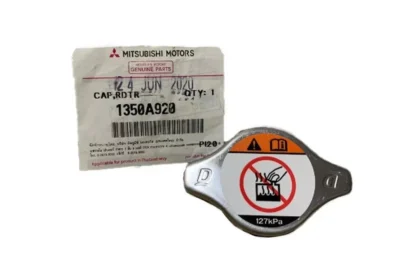
Mấy hôm nay nóng chảy mỡ, xế yêu của các grandiser chạy ngoài đường chắc chắn cũng phải chịu ảnh hưởng của thời tiết nóng và tình trạng kẹt xe. Vì vậ...
